Add CKFinder to CKEditor for image file management.
Client side editors in Drupal often require additional modules to enhance them. If you uploaded CKEditor, without a file management module you won’t be able to search the site for pictures when you click the insert button.
CKFinder is an addition for the CKEditor that will give you file management capabilities. With this installed you will be able to search your site for pictures in your various site directories.
We are assuming you already have the CKEditor installed. If you haven’t done that yet, check this tutorial first. https://www.ostraining.com/blog/drupal/install-ckeditor-in-drupal-7/
With CKFinder installed you will be able to browse your entire site to find pictures and media to insert in your posts, while you’re using the CKEditor.
Step 1: Download CKFinder

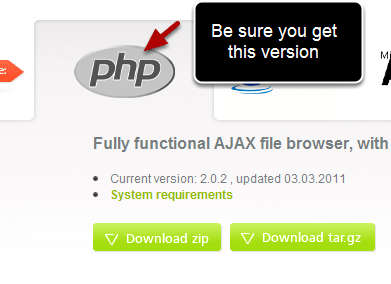
Download: http://ckfinder.com – Download the PHP version.
You’ll see several choices when you visit the site http://ckfinder.com. Mouse over the PHP logo and be sure you download the PHP version. Both the zip version or the tar.gz version are identical. Just make sure you’re decompression program can extract the one you download.
Save the file to your computer and extract it.
Step 2: Upload to your server.

Upload to /sites/all/modules/ckeditor/ so the full path will be /sites/all/modules/ckeditor/ckfinder
There are two nested ckeditor folders, one above the level of ckfinder and, one on the same level. The picture shows you how it should look.
Step 3. Edit the configuration file

- Make a backup copy of the file found at sites/all/modules/ckeditor/ckfinder/config.php
- Modify the file on the site using your cpanel built in file manager or download it and do the work in a text editor
- Find the line in the config.php file that begins with “function CheckAuthentication() “and delete it.
- Delete the entire section including the line function CheckAuthnticaion(), and everything down to, and including, the bracket at the bottom.
Step 4: Add a new line to the same config.php file

- In the same config.php file find the line that says $baseDIr = resolveURL ($baseUrl);
- Directly under it, add this line: require_once ‘../../../../includes/filemanager.config.php’;

Past or type the code directly below $baseDir = resolveUrl($baseUrl);
It should look like the picture above.
$baseDir = resolveUrl($baseUrl);
Save and close the file.
Step 5: Edit the Drupal settings.php file

Open the settings.php file. (Make a backup first). You will find the file in this folder /sites/default
First – Uncomment the line by deleteing the “#” at the front of the line. Change the url to http://yourdomainname.com
Note: By beginning the line with the pound sign “#” , the line is skipped and not read into the program. The # makes the line a “comment”. Programmers use comments to leave instructions and record their changes within the program file while they are working on it. Uncommenting it (removing the #) makes it active again. In a script file you can “comment out” a line to have it skipped, or “uncomment” a line or section to make it active again.
CAUTION: make sure you don’t change an punctuation. Every comma and semicolon is important.
Then scroll down to find the next line to change.

In the same file, scroll down and find the line that begins with “$cookie_domain.”
Note: When I went to do this the $cookie_domain was already uncommented – there was no # before the line. If that’s the case just change the domain name to yours. Different versions and updates may have minor changes, so expect the unexpected.

When you’re done it should look like the example above with no “#”
Save and close the file.
6. Add the image icon to the CKEditor Toolbar
1. Click the Configuration button on the admin menu.
2. Click the CKEditor link under Content Authoring.
That will take you to the Profiles section. You need to add the icon to each profile you have, based on whether you are allowing full html and who you want to give access to.

You’ll see the Profiles section. Click “edit” and you will get the profiles menu. On the menu you will see Editor Appearance. Expand the Editor Appearance section by clicking on it.

Instead of icons or menus, the CKEditor presents you with code to edit. You only have to add one word to the code to add the icon to the editor. Be careful of punctuation marks.

Scroll to the bottom and insert, ‘Image’ in single quotes. Make sure there is a comma between words, but don’t end the line with a comma.
The original line looks like this [‘Link’,’Unlink’,Anchor’] you’re going to change it.
When you’re done the line should look like this:
[‘Link’,’Unlink’,Anchor’,’Image’]
When you view the toolbar in edit mode, the icon will appear.
If you did it correctly, you will see the icon for inserting an image in the toolbar when you go to use the editor. Notice that in the picture above you see the icons for Link, Unlink, Anchor, and Image – exactly what is written in the new line of code in the Toolbar editor. You will see four icons in this segment of the toolbar instead of 3.

You need to first configure CKEditor to allow access to CKFinder.
From the administration menu choose People, then Permissions, then CKFinder access.

Check the appropriate boxes to allow permissions to your users. Access was not turned on by default.

When you are done, and you click the icon you installed, you will see the file manager pictured above.
Hi Ed, nice tutorial, thanks.
I have followed all the steps to setup ckfinder to work on ckeditor on D7
When I create content and try to add an image or flash I see the Browse Server Button.
When I click the Browse Server button I get to the CKFinder2 Folders window where I see the message:
“The file browser is disabled for security reasons. Please contact your system administrator and check the CKFinder configuration file.”
Can you tell me how to resolve this ?
Thanks !
Hi and welcome, Xan!
Sorry for the delay. It’s hard for us to monitor support requests in the comments of blog posts, so if you’re a student at OSTraining please use the support forum where we answer all questions within a business day.
Kind regards,
Nick
After setting the Editor Appearance, I also needed to expand the File Browser Settings section and select CKFinder as the File Browser Type.
Got CKFinder working, however when I upload a file (image) there are two // vs. /. When I manually remove a / the image upload works. I thought I may have a trailing slash in the URL setting, but there is no so I’m not sure what’s happening.
Any suggestions?
Thanks-in-Advance,
John
Hi and welcome, John!
Sorry for the delay. It’s hard for us to monitor support requests in the comments of blog posts, so if you’re a student at OSTraining please use the support forum where we answer all questions within a business day.
Kind regards,
Nick
I’m not a student at OSTraining. Is there a fee?
I was just hoping to find out waht’s causing the extra /
Hi John,
Yes, of course there’s a fee. Like most people (I’m guessing including you) we don’t work for free and we have bills just like everyone else 🙂 You can read more about our training at the following link:
[url=http://www.ostraining.com/drupal-training/]http://www.ostraining.com/d…[/url]
As to your issue, looks like it’s a bug that affects only certain servers:
[url=http://drupal.org/node/1173294#comment-4548372]http://drupal.org/node/1173…[/url]
I would try the baseURL suggestion within that topic.
Kind regards,
Nick
Of course I tried the baseURL and the Cookie domain recommendations, they where all correct. Looks like a Drupal 7 issue as all my other Drupal 6 website work fine.
Hi John,
Which place is the double slash inserted in? Can we get a sample URL?
Kind regards,
Nick
Nick,
Here is a sample URL with both the broken image (extra / not removed) & the image when I remove the extra / in CKFinder:
[url=http://www.irapropertymaster.com/test.htm]http://www.irapropertymaste…[/url]
Thanks,
John
Hi John,
Could you copy and paste what you have for the $base_url variable?
Kind regards,
Nick
Thanks, it is working
One last-mile comment: don’t forget to select CKFinder as your file browser.
After completing these (nicely collected) steps..
1) Go to the Drupal ‘configuration’ page (/admin/config)
2) Click on ‘CKEditor’ under ‘Content Authoring’
3) For each profile, click on the ‘edit’ link
4) Under ‘FILE BROWSER SETTINGS’ select CKFinder s your file browser type
Following this walk-through, then enabling CKFinder, was all I needed to do to get things working. This was on Drupal 7.20 released 2013-02-20. Best of luck!
Hey I found a new and exellent Browser: Quivive File-Manager
[url=http://www.quivive-file-manager.de]www.quivive-file-manager.de[/url]